Install · Steam Deck
Ryujinx on Steam Deck
Install Ryujinx on Steam Deck (SteamOS) using the Linux x64 build — not ARM64. Complete keys, firmware, and game setup in Desktop Mode, then launch from Gaming Mode.
Before you start
- Steam Deck with ~500 MB free storage (internal SSD or microSD for ROMs).
- Desktop Mode for download, keys, firmware, and emulator settings.
- Your own prod.keys and Switch firmware — see setup below (not hosted on this site).
- Game dumps in NSP or XCI format in a folder you control.
Canary or Stable on Deck?
Both channels use the same x64 Linux AppImage or tar.gz. Many Deck users pick Canary for newer compatibility fixes; Stable is better if you want fewer surprise updates.
Choose an install method
Method A — Manual AppImage (full control)
Download the official x64 AppImage yourself, mark it executable, and add it to Steam. Best if you want direct control over the file path and updates.
Method B — EmuDeck (guided setup)
EmuDeck installs Ryujinx, folder layout, and Steam ROM Manager integration in one Desktop Mode workflow. Best for beginners who also use other emulators.
Shortcuts
Latest redirects and full release lists — same official Assets as the forge. For version-matched downloads by OS, use Download by system on the home page.
Method A: Manual install
Switch to Desktop Mode — Hold the Power button → Switch to Desktop. Use Firefox or another browser to download the build.
Download the Linux x64 AppImage — From the home page or release page, grab the x64 AppImage (or x64 .tar.gz). Do not download the ARM64 build — it will not run on Steam Deck.
Make the AppImage executable — Right-click the file → Properties → Permission → Is executable. Or in Konsole: chmod +x Ryujinx_*.AppImage
Launch once in Desktop Mode — Double-click to confirm Ryujinx opens. Complete keys and firmware here before Gaming Mode.
Method B: EmuDeck install
- In Desktop Mode, download the EmuDeck installer from emudeck.com and run it.
- Choose Custom or Easy mode and enable Ryujinx when prompted.
- Let EmuDeck create folders under ~/Emulation/ — ROMs go in Emulation/roms/switch, keys in Emulation/bios/ryujinx/keys.
- After install, open Ryujinx from the Applications menu or EmuDeck launcher and finish keys/firmware in the GUI.
- Use Steam ROM Manager (included with EmuDeck) to add Ryujinx or individual Switch games to your Steam library.
If you later switch to a manual Canary AppImage, update the Ryujinx executable path in Steam ROM Manager to the new file.
First-time setup on Deck (Desktop Mode)
Keys, firmware, and game folders use the same Ryujinx menus as on desktop Linux. Stay in Desktop Mode until this is finished.
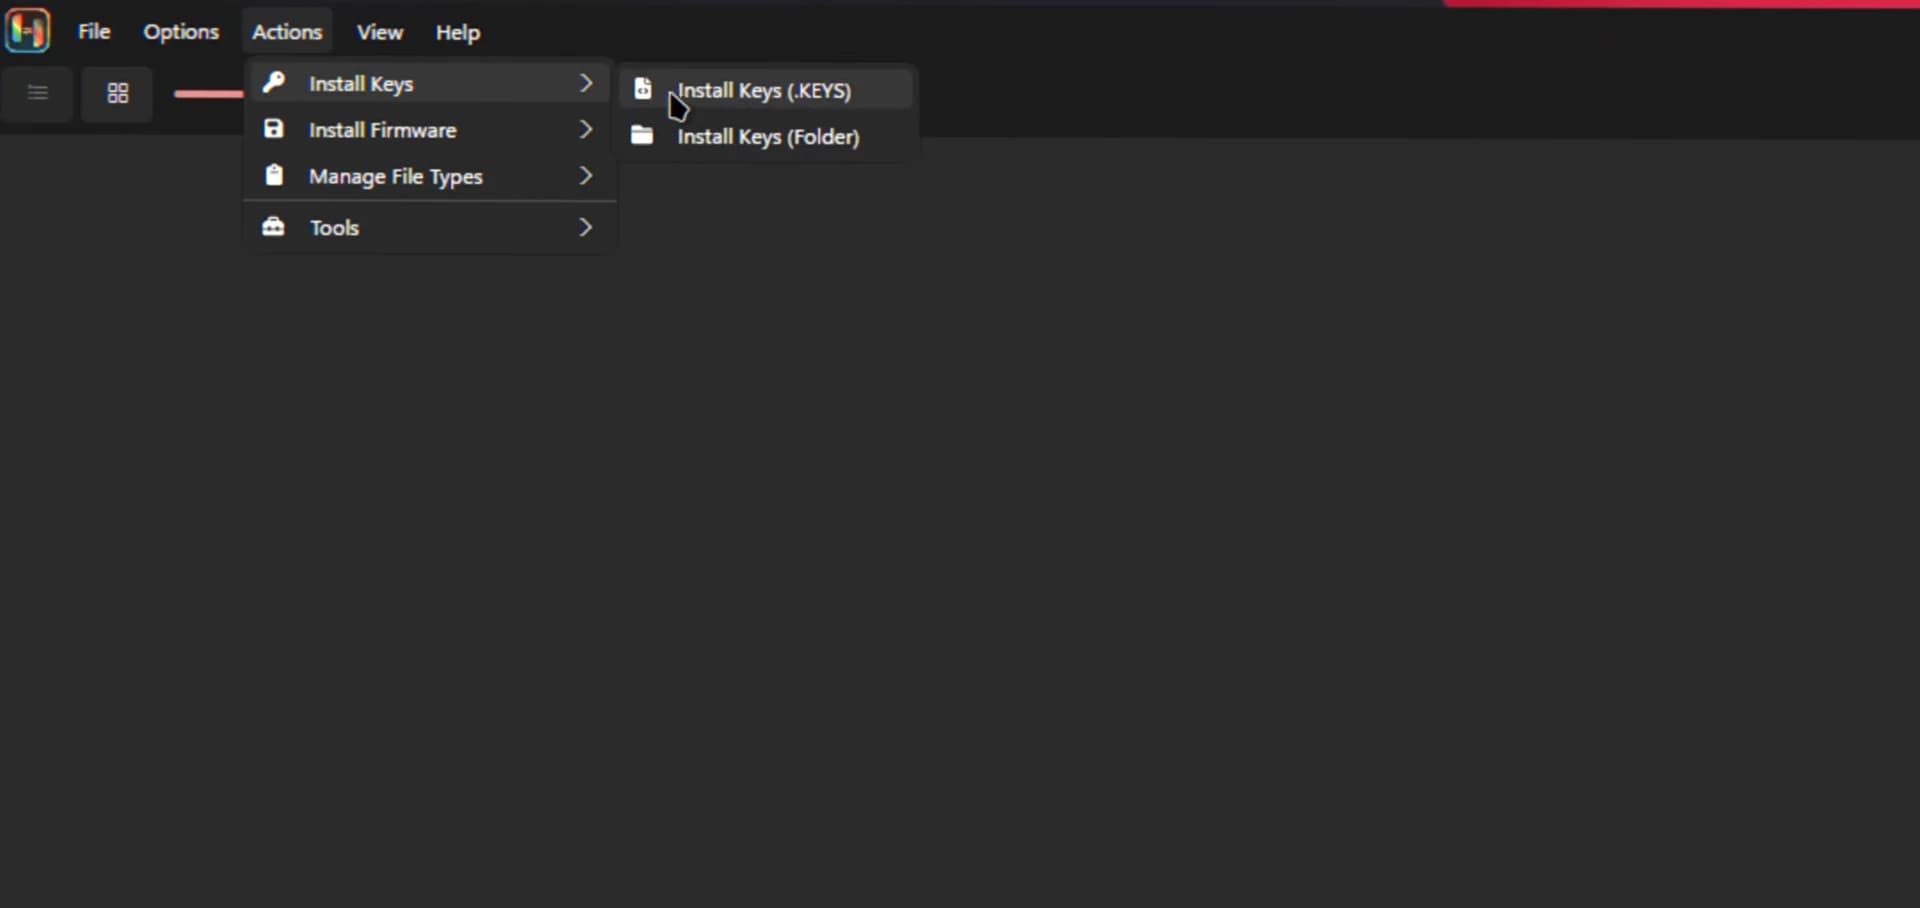
Use Actions / Tools → Install keys, or copy prod.keys into the system folder via File → Open Ryujinx Folder → system.
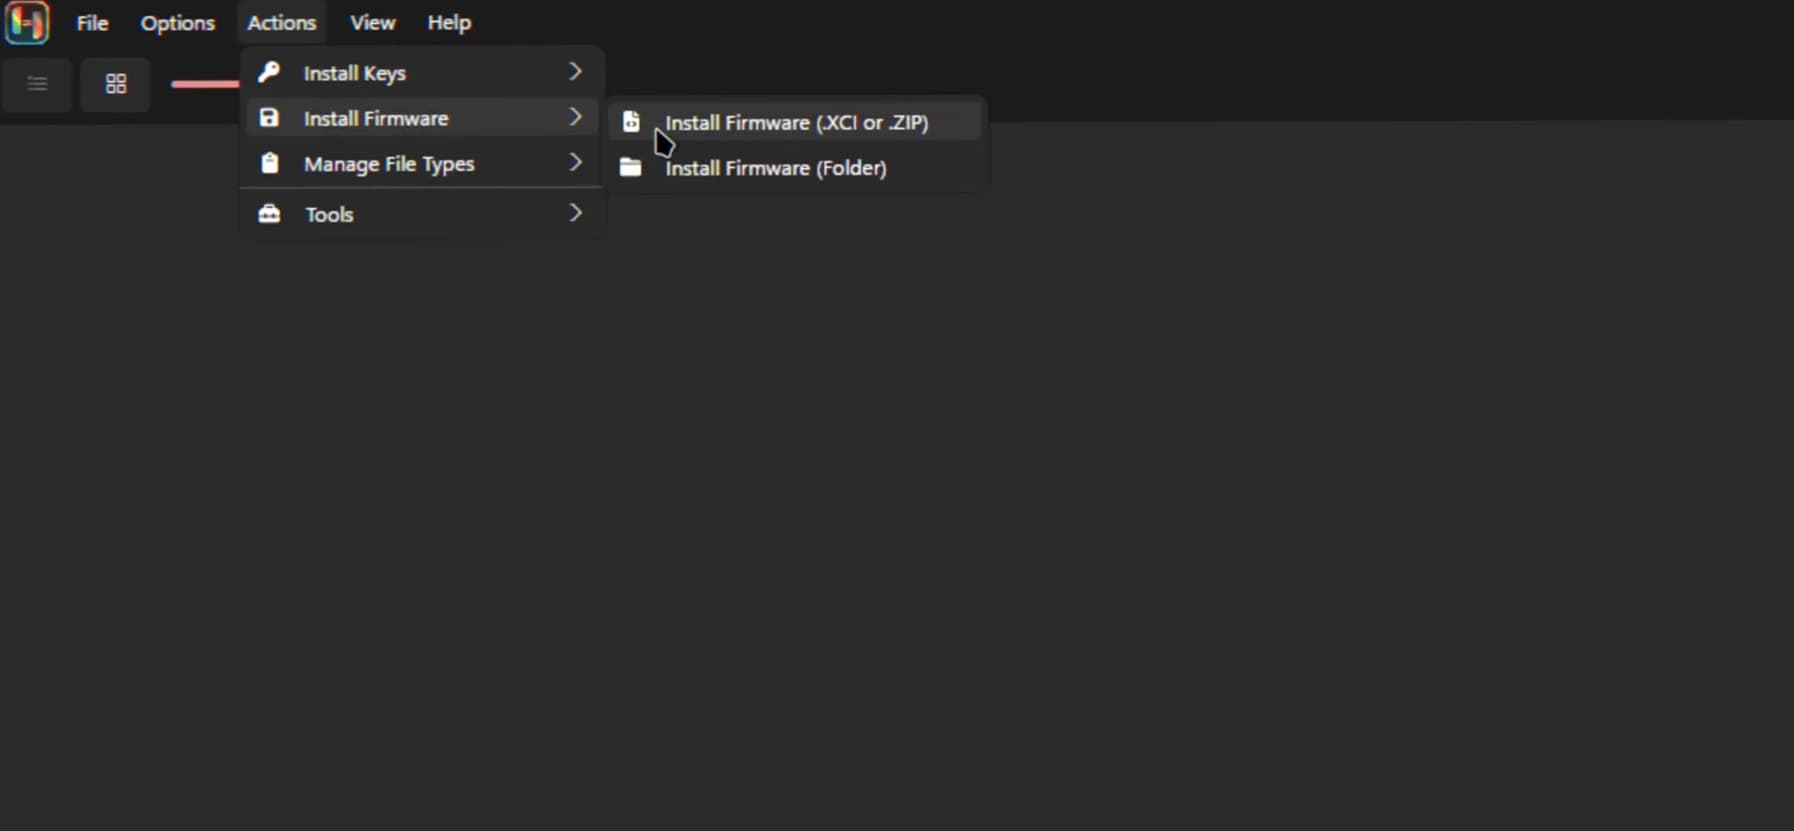
Open Tools / Actions → Install firmware and select your firmware archive. Do not manually extract firmware into folders.
- Add game directories under Options → Settings → Game directories.
- EmuDeck: ROMs in ~/Emulation/roms/switch; confirm keys land in ~/.config/Ryujinx/system or Emulation/bios/ryujinx/keys.
Add Ryujinx to Gaming Mode
- Finish keys, firmware, and at least one game folder in Desktop Mode.
- Right-click the AppImage → Add to Steam. Or use Steam ROM Manager’s Emulators parser to add Ryujinx or per-game shortcuts.
- Click Return to Gaming Mode. Launch Ryujinx from Library → Non-Steam games (or your ROM shortcut).
If Options → Settings menus are hard to click in Game Mode, switch back to Desktop Mode for configuration — see Input tips below.
Recommended graphics settings (Steam Deck)
| Setting | Suggested value | Why |
|---|---|---|
| Graphics backend | Vulkan | Usually best on Deck hardware |
| Resolution scale | 1x (native) | Balances FPS and battery |
| V-Sync | On | Reduces tearing on the panel |
| If stutter or black screen | Try OpenGL | Fallback when Vulkan misbehaves |
Where files live on Deck
| What | Typical path |
|---|---|
| Ryujinx user data | ~/.config/Ryujinx/ |
| prod.keys (manual install) | ~/.config/Ryujinx/system/prod.keys |
| ROMs (EmuDeck) | ~/Emulation/roms/switch/ |
| Keys (EmuDeck shortcut) | ~/Emulation/bios/ryujinx/keys/ |
Use File → Open Ryujinx Folder in the app if a tutorial path does not match your install.
Performance tips
- Keep resolution scale at 1x unless a title runs well headroom.
- Close background apps before heavy games in Gaming Mode.
- Clear shader cache from the game’s right-click menu if visuals glitch after an update.
- Optional: use Decky Loader Power Tools to tune TDP — see EmuDeck wiki for details.
Controller and on-screen keyboard
- Game Mode — Apply/OK not clickable: press Steam + X for the keyboard, then Tab to focus buttons.
- Try Options → Settings → Input → Steam Controller if buttons map incorrectly.
- Configure layouts in Steam’s per-game controller settings after Add to Steam.
Common Deck issues
- Wrong build: always use x64, never ARM64.
- Won't start: quit Ryujinx, rename ~/.config/Ryujinx to Ryujinx.bak, launch again.
- Graphics issues: switch Vulkan ↔ OpenGL under Options → Settings → Graphics.
- After upgrading AppImage: update the path in Steam or EmuDeck if the shortcut still points at the old file.
Steam Deck FAQ
- Can I use the ARM64 Linux build?
- No. Steam Deck needs the x64 (amd64) AppImage or tar.gz.
- EmuDeck vs manual AppImage — which is better?
- EmuDeck is faster to set up with ROM Manager and shared folders. Manual install gives direct control over the binary path and updates.
- Why configure in Desktop Mode first?
- Keys, firmware, and file pickers are easier with a mouse and keyboard. Gaming Mode is for launching games after setup.
- Can ROMs live on the microSD card?
- Yes. Point Game directories at a folder on your SD card. Keep the AppImage on internal storage if you prefer faster launches.
- Should Deck users pick Canary or Stable?
- Canary often gets compatibility fixes sooner; Stable is calmer for daily play. You can keep both in separate folders. Canary vs Stable.